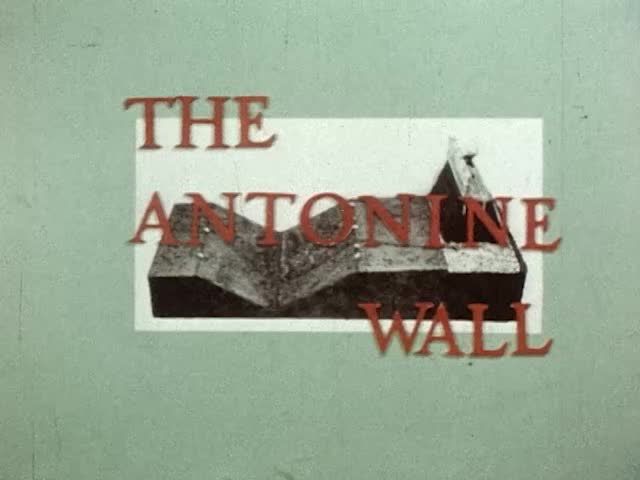
ANTONINE WALL, the
This video is not available to view remotely
Full length video - onsite only

Please read Understanding catalogue records for help interpreting this information and Using footage for more information about accessing this film.
Title: ANTONINE WALL, the
Reference number: 3620
Date: 1956 - 1960
Director: [filmed by Prof. Anne S. Robertson]
Sound: silent
Original format: 16mm
Colour: col
Fiction: non-fiction
Running time: 73.36 mins
Description:
Two elderly gentlemen walking and inspecting the route of the Antonine Wall from the Forth to the Clyde.
The cataloguing of this collection was assisted by referring to the handbook "Scotland's Roman Remains" written by Dr. Lawrence Keppie.
See also ref. 13717
Shotlist:
Reel 1 [Bridgeness to Falkirk]
Title, The Antonine Wall was built by the Romans from the Forth to the Clyde in 142 or 143 A.D. It was held for 40-50 years. (0.10) map of the Antonine wall(0.15) The Wall was of turf set on a stone base, There was a great Ditch to the north and a Military Way to the south. Forts stood at two-mile intervals along the Wall(0.34) split map showing the eastern and western sections of the wall(0.41) The east end of the Antonine Wall was probably very close to where Bridgeness Tower now stands(0.46) brief static shot of Bridgeness Tower(0.50) The legionary tablet set up at the east end of the Wall by men of the Second Legion was found in 1868 just north of Bridgeness Tower. The approximate place of discovery is marked by a modern tablet brief shot of an elderly gentleman approaching the tablet set in a wall and pointing at it(1.07) The line of the Wall at Bo'ness is preserved by Grahamsdyke Lane, rising from the Forth(1.11) single shot of the same(1.24) by Grahamsdyke Road and by Dean Road(1.29) shots of the same(1.45) The hollow of the Ditch is faintly visible west of Dean Road(1.52) elderly gentleman walking along the edge of a field(2.09) single shot of road sign for Kinneil House(2.12) There should be a fort near Kinneil House(2.18) c/u of map(2.23) The south gable of Kinneil House is close to the line of the Wall(2.29) panning shot from the fortified house onto the field opposite(2.46) The Ditch may be seen running across "The Meadows"(2.50) two elderly gentlemen following the route of the ditch(4.12) For over a mile westwards a modern road has been laid in the Ditch(4.18) gentleman walking along the modern road, followed by a shot of a farm building where the man points with the aid of a ruler a crack in the masonry, continues his walk along the road again until he stops again at a cottage and points out another crack below the window of the building(5.25) There should be a fort at Inveravon(5.29) c/u of the map(5.33) two elderly men leave car at Polmonthill cottage/farm? and proceed to walk up a hill(6.12) c/u of split map showing Inveravon to Mumrills pointing at Polmonthill then moving up to the Reservoir(6.19) the two gentlemen walking through a wood, c/u of sign for Polmont, the two men walking through a cemetery(7.35) In 1960 the line of the Wall was found by excavation(7.41) shot of a tractor digging a site ditch(9.00) one of the elderly gentlemen working in the ditch wiping off the surface dirt of a pebbled surface followed by shots of a water hose being applied to the stones(9.32) c/u of the split map showing Inveravon to Mumrills pointing at Church(old) moving up to Dollhouse(9.40) the two gentlemen stop briefly at a farm building to point out a crack on the wall they then follow the road with a brief shot of a post box with the name Beancross on it, the men continue on the road(10.21) c/u of the map with an arrow pointing at Mumrills(10.24) panning shot of farm buildings and field panning round to reveal the two men walking on the road towards their car(10.40) At Mumrills stood the largest known fort on the Antonine Wall(10.44) men cutting away long grass from field with horse drawn scythe(11.02) shot of square hole dug from the cleared field where a schoolgirl is digging whilst being supervised by one of the elderly gentleman and a middle-aged woman, the young girl discovers some fragments of pottery and holds it up to the camera(11.34) digging of ditch with elderly gentleman looking on(12.10) c/u of split map showing arrow moving from Mumrills fort to a railway track(12.18) two elderly gentlemen walking along country road, sign post for Grahamsdyke Street brief shot of men walking down the street(12.31) road sign for Laurieston(Stirlingshire) the two men following the road through the village(13.09) c/u of split map showing arrow pointed at Callender Park(13.14) shot of the two men entering the park(13.28) two men walking through a grass covered ditch(13.57) There should be a fort at Falkirk(14.02) c/u of split map showing arrow pointed at a fort at Falkirk(14.05). [380ft]
Reel 2 [Arnotthill, Falkirk to Rough Castle]
c/u of sign for Arnotthill panning round to show the two elderly gentlemen walking up the road where they then enter a park?(0.57) c/u of split map showing arrow pointing at Bantaskine(1.02) the two men investigating a ditch which has tree cover(2.33) c/u of split map showing arrow pointing at Watling Lodge(2.37) the two men cut across a road and follow the rest of the course of the ditch, the men stop at a house and inspect the wall(4.25) There was a fortlet at Watling Lodge(4.31) c/u of split map showing arrow pointing at Watling Lodge(4.33) brief shot of Watling Lodge? followed by the two men following the route of the ditch(5.36) c/u of split map showing arrow pointing at Tayavalla(5.41) the two men following the route of the ditch(7.40) c/u of split map with arrow pointing at a railway line near Tentfield(7.45) two men cross railway line and continue to follow the route of the ditch(9.42) c/u of split map showing arrow pointing at Rough Castle(9.45) The Ministry of Works is conducting excavations at Rough Castle(9.50) shots of the two men meeting the site supervisor(10.16) ground plan of the fort at Rough Castle with an X on the plan marking where the excavation is taking place?(10.19) site supervisor placing measuring pole? into the ground followed by slow panning shots of the excavation in progress(12.18) the two men leave the site of the excavation and proceed along the route(14.09) To the N.W. of the fort are the lilia or defensive pits(14.16) shot of the two men walking around the pits and then measuring them(15.00). [405ft]
Reel 3 [Rough Castle to Westerwood]
the two elderly gentlemen continue following the route of the wall(1.00) c/u of map showing arrow pointed half way between Rough Castle and Bonnyside House(1.05) Signal Platform with accompanying plan(1.16) two men inspecting the site of the Signal Platform with them moving off and continuing on the route - this part of the route does not have tree cover(2.37) There should be a fort at Seabegs(2.42) c/u of map showing arrow pointed at Seabegs(2.45) two men stop at a farm for directions then continue following the route which now runs parallel with a canal(3.51) c/u of map showing arrow pointed at Seabegs Wood(3.56) two men climb to the top of the wall then proceed to follow the route, they climb back down cross the road and start to walk beside the canal(5.32) c/u of map showing arrow pointed at Seabegs Wood moving onto a canal lock(5.44) two men walking along the road alongside the canal, they stop at a post box and point out the name of "Allandale" on the box(6.40) brief shot of Allandale village with the men continuing their journey through open fields, the two men cross a road and stop at a sign for Castlecary Roman Fort(8.03) they proceed to walk to the Fort as the camera panns round to view the mound(8.54) The fort at Castlecary was defended by a stone wall(9.00) the men continue, stopping briefly to look at a remnant of the defensive wall?, they cross a road and continue their walk through a wooded section(9.57) two men at Castlecary train station cross the rail bridge(10.20) c/u of split map showing an arrow pointing at Garnhall(10.29) the men continue along the route(11.13) c/u of split map showing an arrow pointing at Tollpark(11.16) the two men inspecting the stone part of the ditch, then continue along the route(12.59) c/u of split map showing an arrow pointing at Arnebog(13.03) two men continue walking along the ditch which is now under long grass eventually coming to some farm buildings(14.15) c/u of split map showing an arrow pointing at Westerwood(14.17) Westerwood farm lies in the N.E. corner of the fort(14.23) groundplan of the fort with an arrow pointed at the location of the farm(14.29) the men continue their route from the farm(16.08). [435ft]
Reel 4 [Westerwood to Kirkintilloch]
c/u of map showing arrow pointed at Westerwood Fort moving onto a railway line(0.11) the two elderly gentlemen walking along the top of the ditch which has been fenced off as part of a field(1.12) the two men walking through the ditch which has trees either side(1.26) they climb up from the ditch cross a country lane and continue walking along the route this time in open fields, the men split up and walk opposite sides of the ditch(4.33) c/u of map showing arrow pointed at railway line moving further down the railway line(4.43) men continue their walk along opposite sides of the ditch(5.51) The Ditch on Croy Hill has been hewn out of solid rock. An 80ft. long stretch was never dug.(6.02) ground plan of Croy Hill with arrow pointing at the ditch?(6.09) c/u of map showing arrow pointing at Croy Hill(6.12) the two men inspecting Croy Hill(7.58) Croy Hill is the mid point of the Wall, 470ft. above sea level(8.04) the men continue their inspection of Croy Hill(8.45) c/u of map showing arrow pointing just beyond Croy Hill(8.50) men follow the route and come towards Croy - c/u of Croy sign post(9.27) c/u of map showing arrow pointing at Girnal Hill? and moving onto Castle Hill(9.38) men continue along the route of the ditch(11.43) c/u of map pointing at Bar Hill(11.46) Bar Hill was the highest fort on the Wall(11.52)the men continue in a wooded section finally coming to the well at Bar Hill(12.44) From the Well on Bar Hill came many finds, including stone columns(12.49) c/u of map showing arrow pointing at Bar Hill then moving on towards Twechar(12.56) the two men following the route stop at a road sign for Twechar then proceed to cross a canal bridge(13.58) Roman tombstones have been found at Shirva(14.04) the two men walking along a road with farm buildings in the foreground(14.23) Roman alters have been found at Auchendavy, followed by illustrations of the four alters(14.36) c/u of map showing arrow pointing at Auchendavy(14.40) the two men walking through Auchendavy(15.12). [410ft]
Reel 5 [Kirkintilloch to Clyde]
c/u of sign post for the "County of Dunbarton" followed by sign post for the "Burgh of Kirkintilloch"(0.08) A fort has recently been located at Kirkintilloch(0.12) c/u of map showing arrow pointing at Kirkintilloch(0.16) the two elderly gentlemen come towards a sign post pointing to the "Roman Fort, Auld Kirk" they enter a park[Peel Park?] and survey the scene(0.47) There was a fortlet at Glasgow Bridge(0.53) c/u of map showing arrow pointing at Glasgow Bridge(0.55) c/u of sign post for "County of Lanark" then the two men cross a canal bridge and walk along a country road(1.44) c/u of map showing arrow pointing at Cadder(1.47) The fort at Cadder is now destroyed by a sand quarry(1.54) two men following the road come towards the sand quarry pass by and then come to "Balmuildy Road"(2.25) There was a fortlet at Wilderness Plantation(2.29) c/u of map showing arrow pointing at Wilderness Plantation(2.32) the men continue down the road and come to a sign for "Glasgow City Boundary" they continue their walk through an open field(3.26) c/u of map showing arrow pointing at Balmuildy(3.30) The fort at Balmuildy was defended by a stone wall. It guarded a crossing of the Kelvin.(3.36) ground plan of the fort at Balmuildy(3.42) shots of the men walking along the route between road and field with panning shots of the areas concerned(5.07) sign for "New Kilpatrick Cemetery" the men walk through the cemetery then stop at an information board headed "The Roman Wall" shots of the remnants of the wall which runs through the cemetery(6.00) There should be a fort at Bearsden(6.05) c/u of map showing arrow pointing at Bearsden(6.08) two men walking along a road they come to a road sign posted "Roman Road" then move on to "Thorn Rd.", "Thorn Dr.", "Milverton Ave." - Bearsden?(7.02) the two men continue their walk through a wooded area(7.54) There was a fort on Castlehill(7.59) c/u of map showing arrow pointing at Castlehill(8.03) men continuing their route then reach a country road just before a small town - Duntocher?(9.07) c/u of map showing arrow pointing at Duntocher(9.10) At Duntocher there was first a fortlet, then a fort. It was the smallest known fort on the Wall. It now lies under a football pitch(9.27) the men enter the football pitch with a panning shot of of the pitch with a boys football match in progress(9.58) ground plan of Duntocher fort with red dots following the route of the ditch(10.10) shots of the men leaving the pitch then proceeding through the town passing "Beeches Rd." and heading off in the direction of Old Kilpatrick(12.17) c/u of road sign for "Old Kilpatrick"(12.19) c/u of map showing arrow pointing at Old Kilpatrick(12.22) There was a fort at Old Kilpatrick at the west end of the Wall(12.29) ground plan of the fort at Old Kilpatrick with red dots showing the route into Gavinburn Gardens(12.32) the two men stop at the street sign for Gavinburn Gardens then wait for a boat to pass through the canal lock(12.56) Here stood a legionary tablet set up by men of the Twentieth Legion. This was the N.W. corner of the Roman Empire(13.06) end credit(13.11). [356ft]